

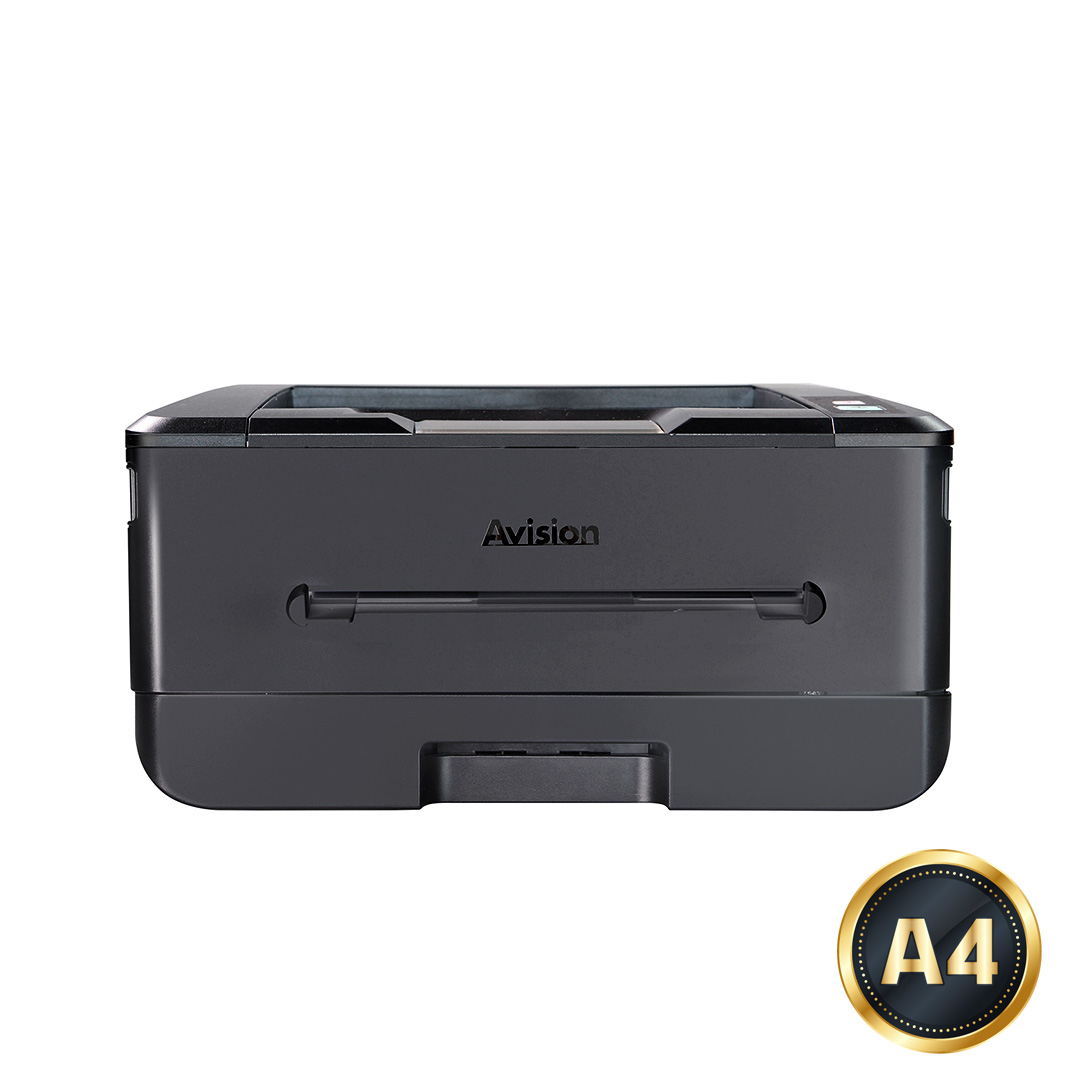
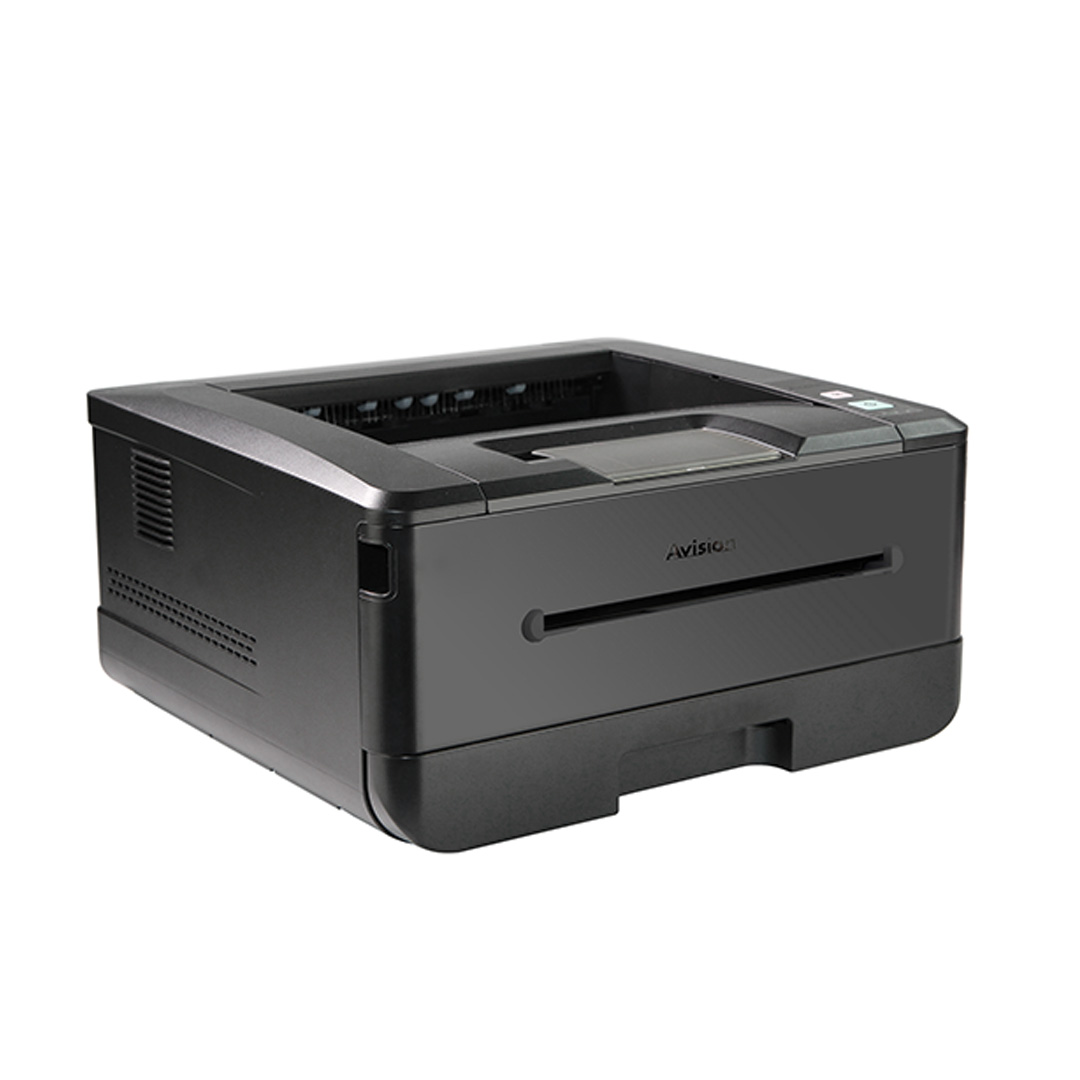
AP33

Printing Smarter, Budgets Wiser: Your Compact Solution!

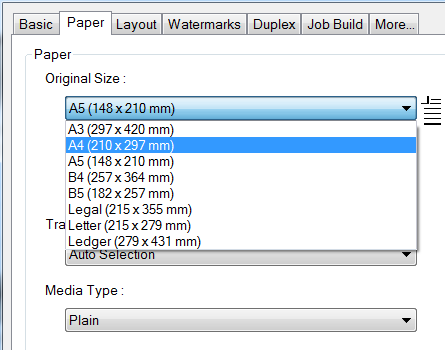
The AP33 is an A4 printer that can be used for local printing, wired and wireless network printing up to Legal size (216×356 mm, 8.5×14 in.). The AP33 boosts your efficiency by offering fast printing speed up to 33 ppm (A4). What is best, the printer provides various features to ensure efficient and effective printout including network printing, printing on both sides, collating (sorting the printed pages), printing multiple pages on a single sheet, adding watermark in the background, and so on.

Product Details


▍Fast, High-Quality Printing

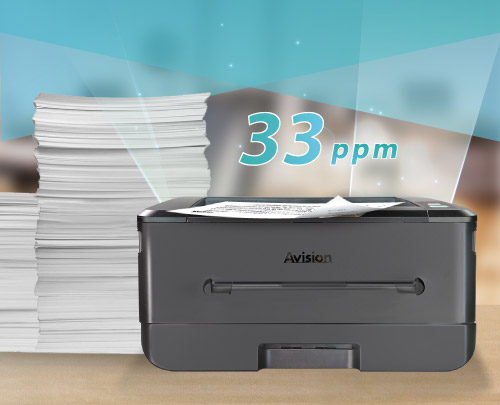
Produce professional black and white output at impressive print speeds of up to 33 pages per minute.

▍Built-Duplex Print Unit

Use the automatic duplex printing feature to help save paper and reduce costs.


AP33Q_S1
AP33Q_S2  

▍Convenient Mobile Printing (Optional)

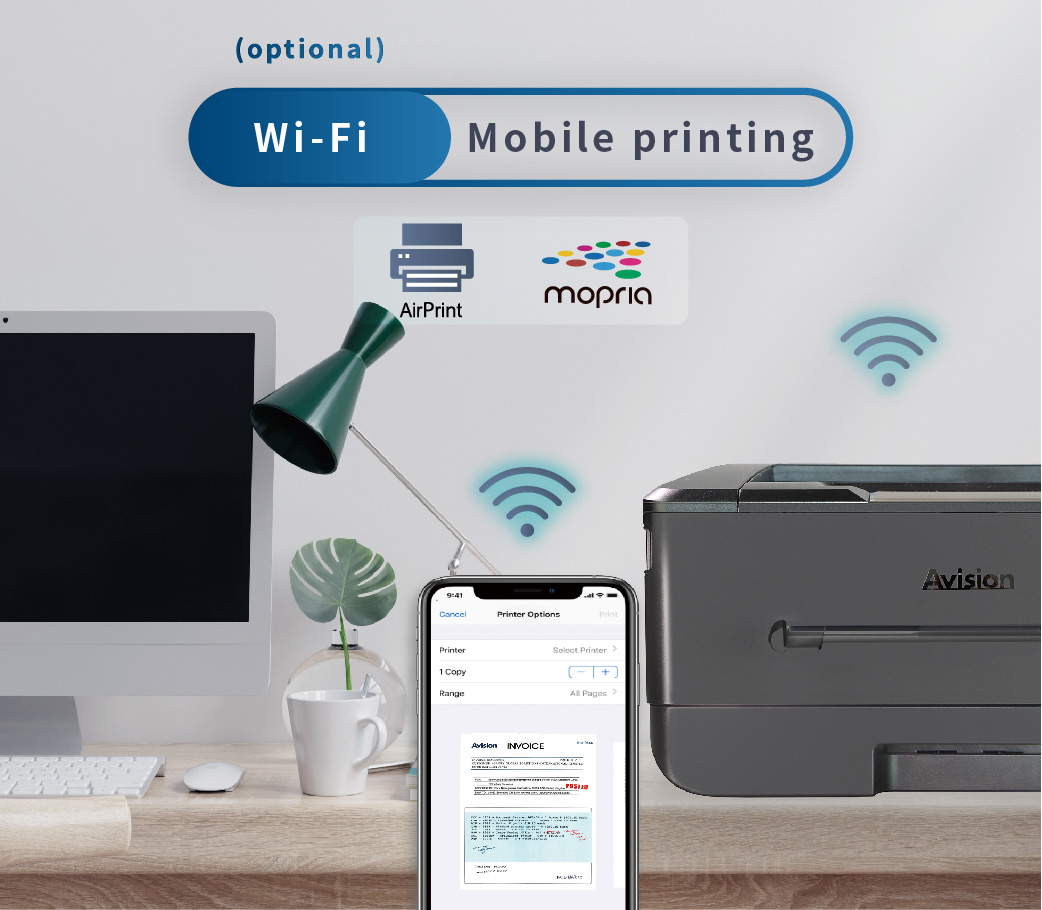
The product is able to connect to your mobile devices wirelessly and supports Android Mopria or iOS AirPrint. Simply download the corresponding app, you can complete printing through your mobile devices and enjoy the convenience and benefit of wireless transmission!


▍Remote Device Management via the Embedded Web Page

The product provides a convenient way to view the supplies status, scan count, and copy count to help you maintain the product well. By simply typing the machine’s IP address in the URL field of your browser, the product’s embedded web page will be prompted.


Specification

General Specification
CPU

1GHz

RAM

256 MB

Display

LED

Paper input

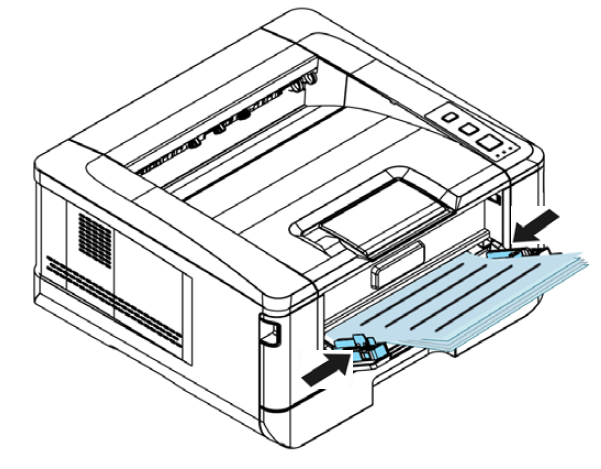
Face down(Main tray),Face up(Manual tray)

Paper output capacity

150 Pages(70 g/m² , plain paper)

Resolution

1200 x 1200 dpi

Printing Speed

33ppm (A4) / 35ppm (Letter)

First print output time

<11s

Dimensions (WxDxH)

404 x 380 x 204 mm

Weight

8.5 kg ( 18.7 lb. )

Maximum media size

Legal ( 216 x 356 mm )

Minimum media size

76 x 127 mm

Connectivity

USB 2.0, Wi-Fi(optional), 10 / 100 Base-T Ethernet

Power source

100~127 VAC, 60 Hz or 220~240 VAC, 50/60 Hz

PDLs/Emulations

GDI

Edge Erase

4.3 mm ( top, bottom, left, right )

Printing features

Network Print

Duplex printing unit

Automatic

Paper weight

60 to 120 g/m²

Main tray
Paper capacity

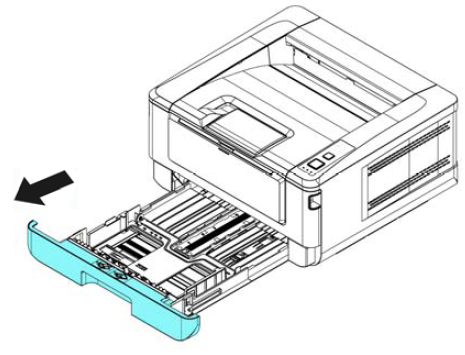
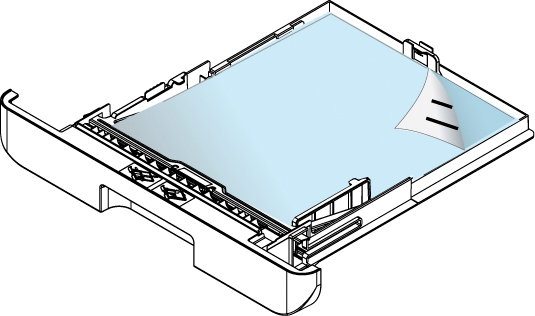
250 pages (70 g/m² plain paper )

Paper weight

60 to 120 g/m²

Manual tray
Paper capacity

1 Page ( 70 g/m² , plain paper)

Paper size

A4, B5(JIS), A5, A6, letter, Legal, 76 x 127 mm to 216 x 356 mm

Paper weight

60 to 200 g/m²

Software
Supported operation system

Win 11 , Win 10 , Win 8 , Win 7

Mobile printing support

AirPrint and Mopria Print Service

Consumables
Toner Cartridge

1,500 pages, 3,000 pages

Drum Unit

30,000 sheets

Recommanded Monthly Print Volumn

1,500 ~ 3,000 pages

Maximum Monthly print Duty cycle

60,000 pages

Environmental Factors
Humidity

15% ~ 80%

Temperature

10 ~ 32 C

* The above specifications may vary due to computer performance and sales regions. For further details, please consult your local distributor.

▎Product Photos

200
High resolution Medium resolution Low resolution
16.98 MB 500.41 KB 169.76 KB
DownloadDownloadDownload

▎User Manual

VersionSizeLink
简体中文11.21 MBDownload
繁體中文8.30 MBDownload
Deutsch8.17 MBDownload
English7.79 MBDownload
Español8.01 MBDownload
Français8.49 MBDownload
Italiano7.93 MBDownload
Português19.89 MBDownload
Русский8.53 MBDownload

▎Brochure

VersionSizeLink
简体中文1016.37 KBDownload
繁體中文1.16 MBDownload
English986.04 KBDownload

▎Quick Guide

VersionSizeLink
Multiple Languages1.57 MBDownload

▎Drivers

NameVersionSizeOS SupportLink
A4PQ SeriesCertified44.29 MBWindows 7 / 8 / 10 / 11
Windows Server 2008R2 / 2012 / 2016 / 2019 / 2022 / 2025
Download
AP33Latest43.13 MBWindows 7 / 8 / 10 / 11
Windows Server 2008R2 / 2012 / 2016 / 2019 / 2022 / 2025
Download

*If there are any issues with the Latest Driver, please download the certified version or contact us at service@avision.com.tw for assistance.

NameVersionSizeOS SupportLink
Print Mac Driver2026040212.66 MBmacOS10.12~10.15 ,macOS11 Big Sur ,macOS12 Monterey , macOS13 Ventura ,macOS14 Sonoma ,macOS15 Sequoia , macOS26 TahoeDownload
Linux 64-bit2026072918.02 MBDebian , UbuntuDownload
Linux 32-bit2026072916.97 MBDebian , UbuntuDownload
Linux 64-bit2026072918.01 MBFedora , openSUSEDownload
Linux 32-bit2026072916.99 MBFedora , openSUSEDownload

Supplies & Accessories

003-8403-0

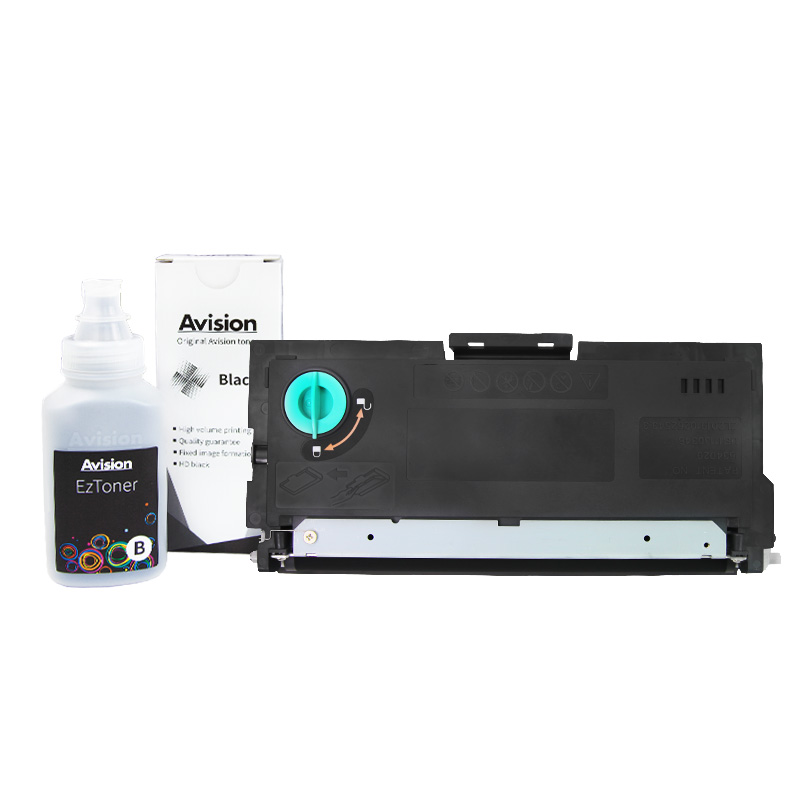
▍Refillable EzToner

Page yield (black and white): 3,000 pages

View Details ➡︎

▎Instruction

  • User Check

    1. Check if proper paper type has been selected in printer driver.

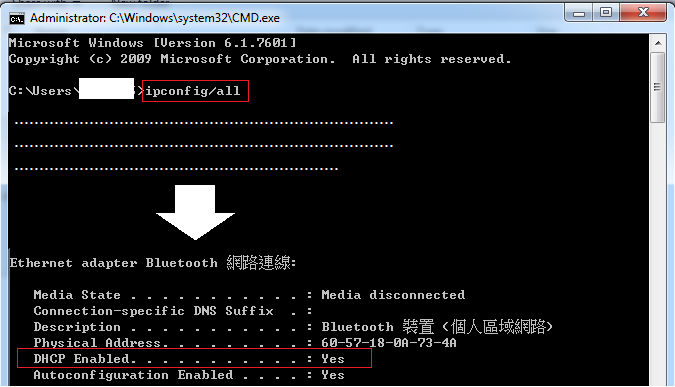
  • This error occurs when the printer requests information from the DHCP server and DHCP server does not respond.

    User Check

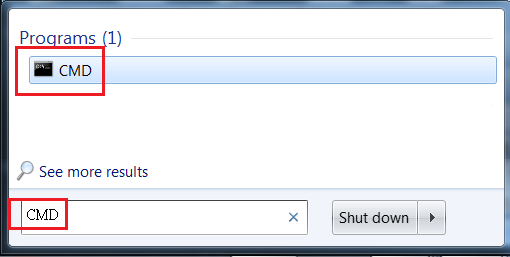
    1. Search the CMD and launch on your PC.

    2. key-in inconfig/all to check whether the DHCP server work in advance.


    3. Contact to IT person to check the DHCP server setting.

  • There are two or more device using the same IP in the same one LAN area.

    User Check

    1. Please reset the fixed IP address, or contact to IT person to check the router setting.

  • User Check

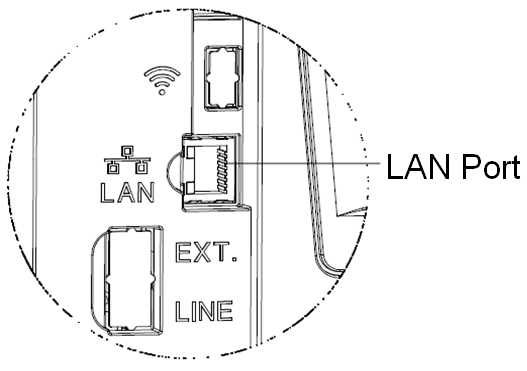
    1. Please plug the ethernet cable.
    2. If it still happen, test this cable on others devive to ensure this cable work, or not, try with another cable.

▎Hardware Related

  • User Check

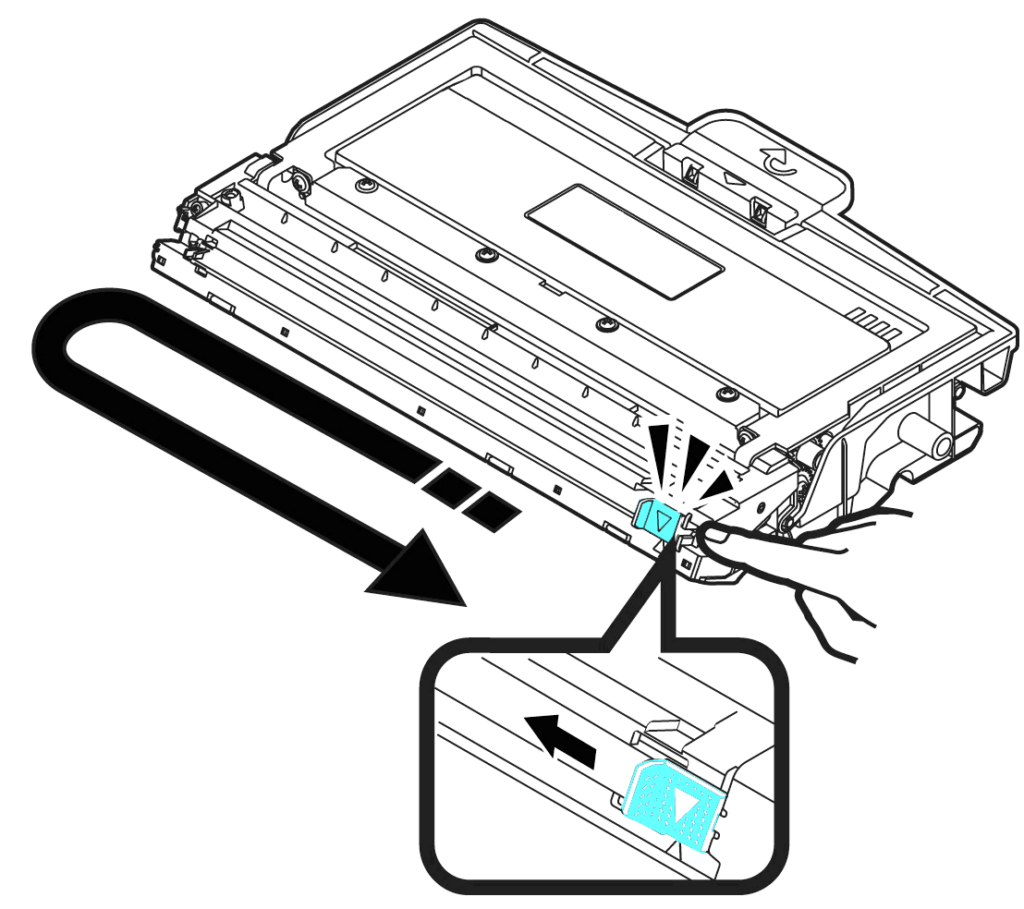
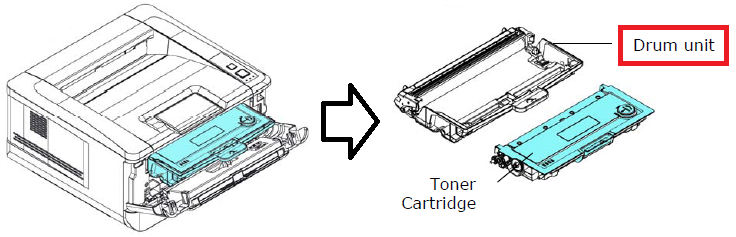
    1. Clean the corona wire or the power grid of the drum unit.
    Slide the corona wire to the end and then back to the original place. Repeat this for at least 3 times

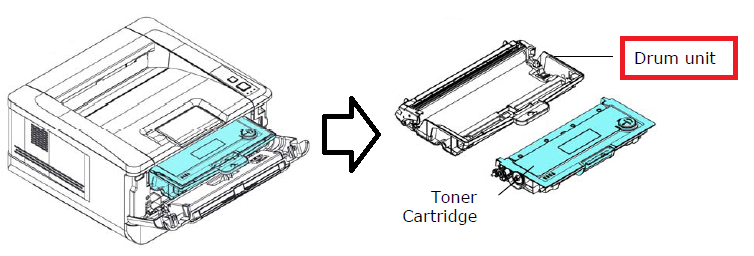
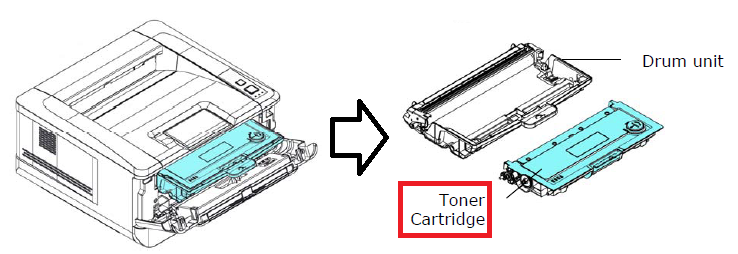
    2. Replace drum unit. <Video Link>


    3. Replace toner unit. <Video Link>

  • User Check

    1. Please try to restart the printer or MFP.

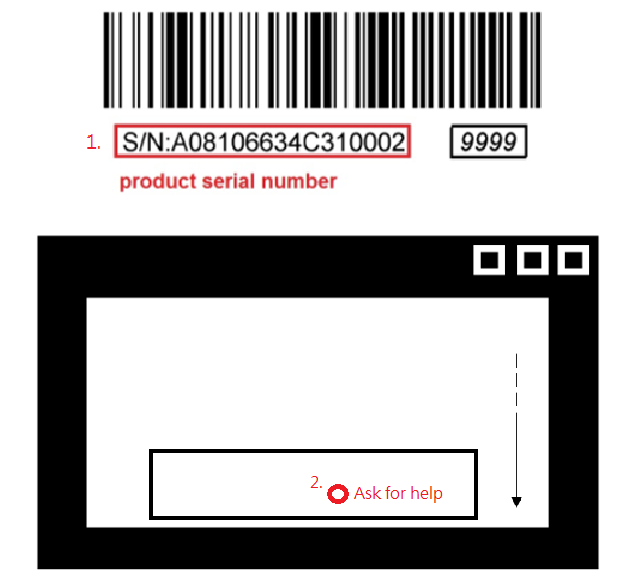
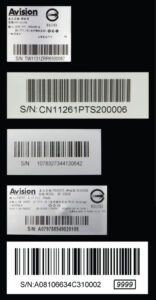
    2. If the problem still happen, please kindly check the serial number on your scanner label first, then click the following "Ask to help" option to full the form then feedback to us, thanks.

  • User Check

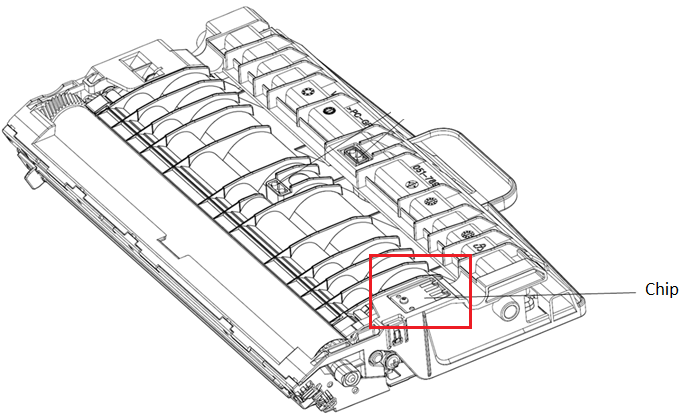
    1. Please ensure you had replaced the toner cartridge from original manufacturer. <Video Link>

  • User Check

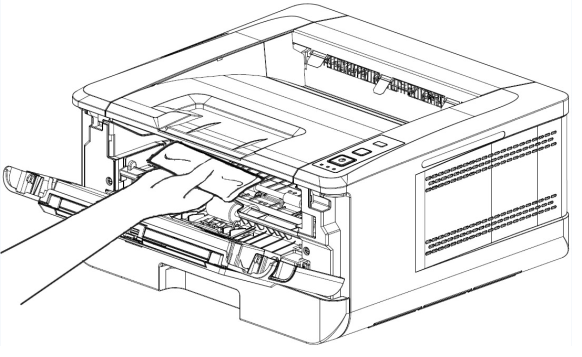
    1. There is dirt on the printer internal. wipe off the dirt on the paper path or roller.

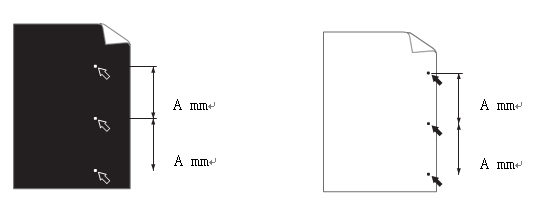
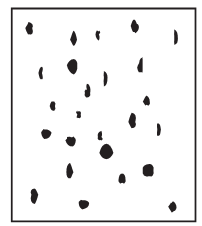
    2. Check whether fixed distance of the dust on the paper and measure it, 33.1 mm is toner issue and 75.4 mm is drum issue, confirm and judge which one need to be replace.

    3. Replace drum unit. <Video Link>

    4. Replace toner unit. <Video Link>


  • User Check

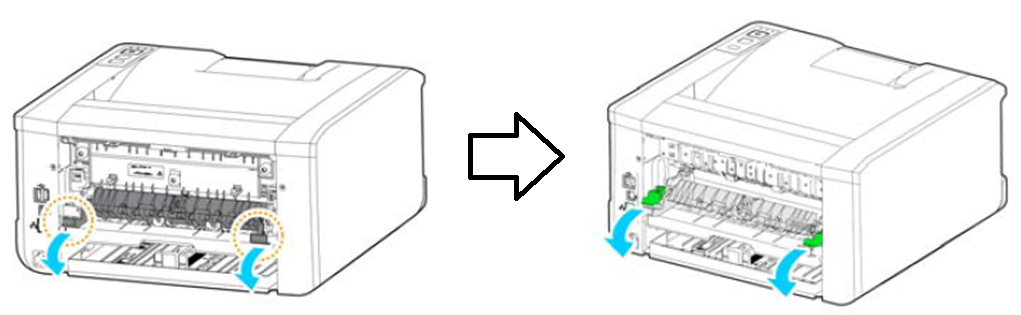
    1. Open rear cover to pull down the paper path & green arm of the both side.

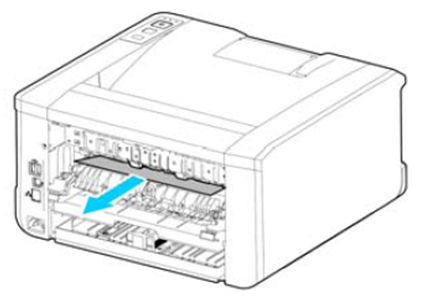
    2. Remove the jammed paper and ensure this position without any foreign obgects.

    3. Return the paper path & green arm of the both side then close the rear cover then

    <Video Link>

  • User Check

    1. Check the environment. High or low temperature/humidity may cause the problem.
    2. Replace drum unit. <Video Link>

    3. Replace toner unit. <Video Link>

  • User Check

    1. Please ensure you had replaced the toner cartridge from original manufacturer. <Video Link>

  • User Check

    1. Check whether happen both on PC print and copy function.
    2. If it happen only on copy function, check your original document image.

  • User Check

    1. If the printer has been evenly positioned.
    2. Replace drum unit. <Video Link>

  • User Check

    1. Clean the corona wire or the power grid of the drum unit.
    Slide the corona wire to the end and then back to the original place. Repeat this for at least 3 times

    2. If the problem still happen, try to replace drum unit. <Video Link>

  • User Check

    1. Clean the corona wire or the power grid of the drum unit.
    Slide the corona wire to the end and then back to the original place. Repeat this for at least 3 times

    2. Replace drum unit. <Video Link>

  • User Check

    1. Replace drum unit. <Video Link>

  • User Check

    1. Check the operating environment. High temperature and high humidity or low temperature and low humidity conditions can cause this problem.
    2. Replace toner unit. <Video Link>

  • User Check

    1. Clean the corona wire or the power grid of the drum unit.
    Slide the corona wire to the end and then back to the original place. Repeat this for at least 3 times

    2. Replace drum unit. <Video Link>

  • User Check

    1. Check the operating environment. High temperature and high humidity or low temperature and low humidity conditions can cause this problem.
    2. Replace toner unit. <Video Link>

  • User Check

    1. Clean the corona wire or the power grid of the drum unit.
    Slide the corona wire to the end and then back to the original place. repeat this for at least 3 times

    2. This problem will disappear after printing for a few pages.
    3. Replace drum unit. <Video Link>

  • User Check

    1. Clean the corona wire or the power grid of the drum unit.
    Slide the corona wire to the end and then back to the original place. Repeat this for at least 3 times

    2. This problem will disappear after printing for a few pages.
    3. Replace drum unit. <Video Link>


    4. Replace toner unit. <Video Link>

    5. There is dirt on the printer internal. wipe off the dirt on the paper path or roller.

  • User Check

    1. This problem may be solved after printing a few pages.
    2. There is dirt on the printer internal. wipe off the dirt on the paper path or roller.


  • This image has an empty alt attribute; its file name is image-34.png

    User Check

    1. Check the environment. High or low temperature/humidity may cause the problem.
    2. Check if the paper is damp.
    3. Replace drum unit. <Video Link>


    4. Replace toner unit. <Video Link>

  • User Check

    1. Clean the corona wire or the power grid of the drum unit.
    Slide the corona wire to the end and then back to the original place. Repeat this for at least 3 times

    2. This problem will disappear after printing for a few pages.
    3. Replace drum unit. <Video Link>


    4. Replace toner unit. <Video Link>

  • User Check

    1. Clean the corona wire or the power grid of the drum unit.
    Slide the corona wire to the end and then back to the original place. Repeat this for at least 3 times

    2. This problem will disappear after printing for a few pages.
    3. Replace drum unit. <Video Link>

  • User Check

    1. 4. Replace toner unit. <Video Link>

  • This image has an empty alt attribute; its file name is image-15.png

    User Check

    1. The problem may disappear after printing a few pages.
    2. Check whether fixed distance of the dust on the paper and measure it, 33.1 mm is toner issue and 75.4 mm is drum issue, confirm and judge which one need to be replace.

    3. Replace drum unit. <Video Link>

    4. Replace toner unit. <Video Link>

    5. There is dirt on the printer internal. wipe off the dirt.

  • This image has an empty alt attribute; its file name is image-27.png

    User Check

    1. Check the environment. High or low temperature/humidity may cause the problem.
    2. Clean the corona wire or the power grid of the drum unit.
    Slide the corona wire to the end and then back to the original place. Repeat this for at least 3 times

    3. Replace drum unit. <Video Link>


    4. Replace toner unit. <Video Link>

  • This image has an empty alt attribute; its file name is image-28.png

    User Check

    1. Check the environment. High or low temperature/humidity may cause the problem.
    2. Clean the corona wire or the power grid of the drum unit.
    Slide the corona wire to the end and then back to the original place. Repeat this for at least 3 times

    3. Replace drum unit. <Video Link>


    4. Replace toner unit. <Video Link>

  • User Check

    1. There is dirt on the printer internal. wipe off the dirt on the paper path or roller.

    2. Check whether fixed distance of the dust on the paper and measure it, 33.1 mm is toner issue and 75.4 mm is drum issue, confirm and judge which one need to be replace.

    3. Replace drum unit. <Video Link>


    4. Replace toner unit. <Video Link>

  • User Check

    1. The problem could be disappeared after printing a few pages.
    2. Replace drum unit. <Video Link>

  • User Check

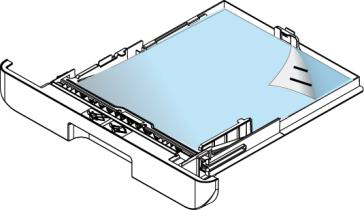
    1. No paper on the main tray, please load the paper to main tray.

  • User Check

    1. Please try to restart the printer or MFP.

    2. If the problem still happen, please kindly check the serial number on your scanner label first, then click the following "Ask to help" option to full the form then feedback to us, thanks.

  • User Check

    1. Check the operating environment. High temperature and high humidity or low temperature and low humidity conditions can cause this problem.
    2. Check if the paper is damp.

  • User Check

    1. Please try to restart the printer or MFP.

    2. If the problem still happen, please kindly check the serial number on your scanner label first, then click the following "Ask to help" option to full the form then feedback to us, thanks.

  • User Check

    1. Please try to restart the printer or MFP.

    2. If the problem still happen, please kindly check the serial number on your scanner label first, then click the following "Ask to help" option to full the form then feedback to us, thanks.

  • User Check

    1. Please try to restart the printer or MFP.

    2. If the problem still happen, please kindly check the serial number on your scanner label first, then click the following "Ask to help" option to full the form then feedback to us, thanks.

  • User Check

    1. Please try to restart the printer or MFP.

    2. If the problem still happen, please kindly check the serial number on your scanner label first, then click the following "Ask to help" option to full the form then feedback to us, thanks.

  • User Check

    1. Please try to restart the printer or MFP.

    2. If the problem still happen, please kindly check the serial number on your scanner label first, then click the following "Ask to help" option to full the form then feedback to us, thanks.

  • User Check

    1. Please try to restart the printer or MFP.

    2. If the problem still happen, please kindly check the serial number on your scanner label first, then click the following "Ask to help" option to full the form then feedback to us, thanks.


  • User Check

    1. Please try to restart the printer or MFP.

    2. If the problem still happen, please kindly check the serial number on your scanner label first, then click the following "Ask to help" option to full the form then feedback to us, thanks.

  • User Check

    1. Please try to restart the printer or MFP.

    2. If the problem still happen, please kindly check the serial number on your scanner label first, then click the following "Ask to help" option to full the form then feedback to us, thanks.


  • User Check

    1. Please try to restart the printer or MFP.

    2. If the problem still happen, please kindly check the serial number on your scanner label first, then click the following "Ask to help" option to full the form then feedback to us, thanks.


  • User Check

    1. Please try to restart the printer or MFP.

    2. If the problem still happen, please kindly check the serial number on your scanner label first, then click the following "Ask to help" option to full the form then feedback to us, thanks.

  • User Check

    1. Please try to restart the printer or MFP.

    2. If the problem still happen, please kindly check the serial number on your scanner label first, then click the following "Ask to help" option to full the form then feedback to us, thanks.


  • User Check

    1. Open rear cover to pull down the paper path & green arm of the both side.

    2. Remove the jammed paper and ensure this position without any foreign obgects.

    3. Reverse order the paper path & green arm of the both side then close the rear cover then try again.

    <Video Link>

  • User Check.

    1. Open front cover and remove the drum unit to confirm the jammed paper.

    2. Or open the main tray to remove the jam paper.


    3. Check if there is any foreign object on the paper path.

    <Video Link>
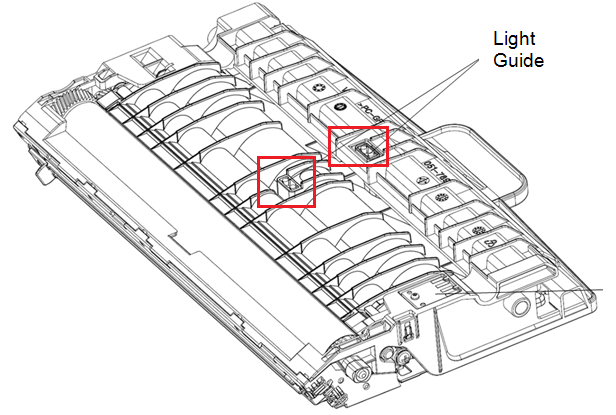
    4. Check if the light guide pillar of the drum unit is contaminated by clean cotton swab to wipe with isopropyl alcohol (95%).

  • User Check

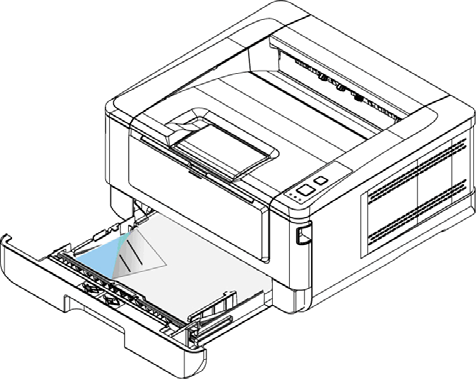
    1. Take out the duplex unit and open the main tray to remove the jammed paper.


    2. And open the main tray to remove the jammed paper.

    3. Close the main tray then set the duplex unit to try again.

    <Video Link>

  • User Check

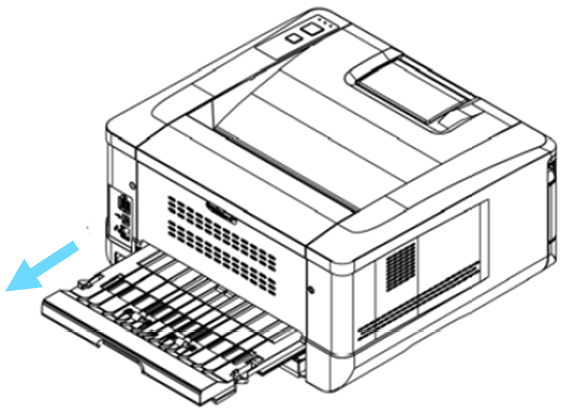
    1. Take out the duplex unit and open the rear cover to remove the jammed paper.

    2. And open the rear cover to remove the jammed paper.

    3. Close the cover to try again.

    <Video Link>

  • User Check

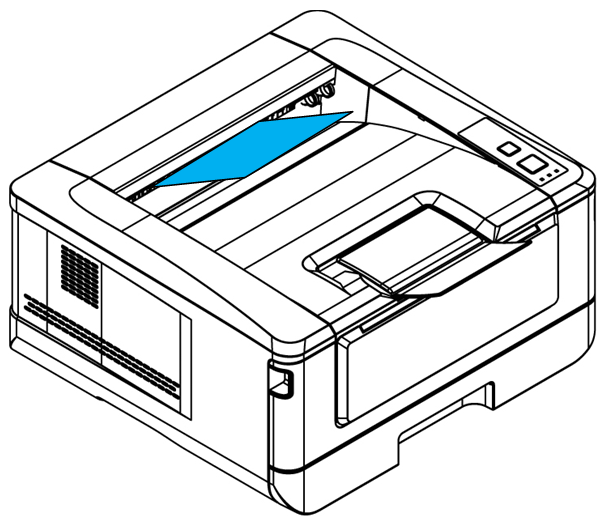
    1. Open the rear cover to remove the jammed paper.

    2. Close the cover to try again.

    <Video Link>

  • User Check

    1. Removal the Jam from exit position to try again.

    2. Open the rear cover to check whether there are others paper.

    <Video Link>

  • User Check

    1. Open front cover and remove the drum unit to confirm the jammed paper.

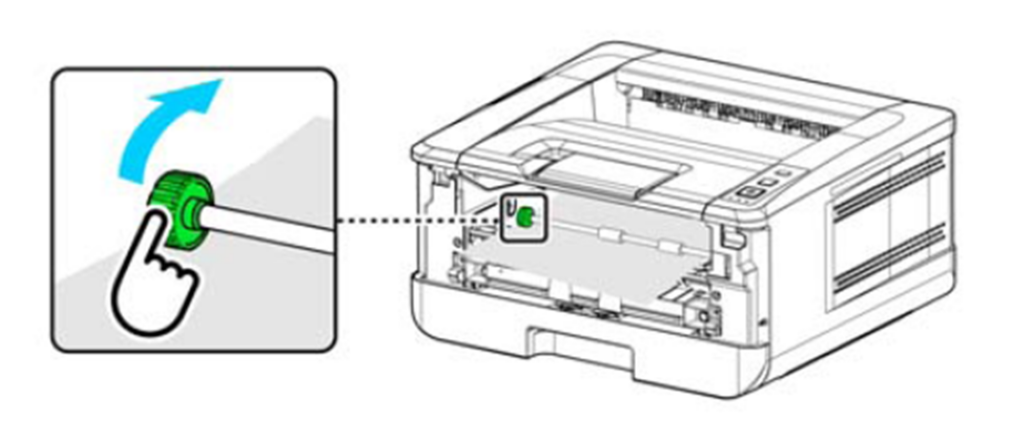
    2. Check if there are the jammed paper, rotate the green release wheel to take the paper back way, also check if there is any foreign object on the paper path..

    3. Then open the main tray to remove the jam paper.

    5. Close the main tray and return the drum unit then close the front cover to try again.

    <Video Link>

    6. Check if the light guide pillar of the drum unit is contaminated by clean cotton swab to wipe with isopropyl alcohol.

  • User Check

    1. Open front cover and remove the drum unit to confirm the jammed paper.

    2. Check if there are the jammed paper, rotate the green release wheel to take the paper back way, also check if there is any foreign object on the paper path..

    3. Then open the main tray to remove the jam paper.

    5. Close the main tray and return the drum unit then close the front cover to try again.

    <Video Link>

    6. Check if the light guide pillar of the drum unit is contaminated by clean cotton swab to wipe with isopropyl alcohol.

  • User Check

    1. Open front cover and remove the drum unit to confirm the jammed paper.

    2. Or open the main tray to remove the jam paper.


    3. Check if there is any foreign object on the paper path.

    <Video Link>
    4. Check if the light guide pillar of the drum unit is contaminated by clean cotton swab to wipe with isopropyl alcohol (95%).

  • User Check

    1. Open front cover and remove the drum unit to confirm the jammed paper.

    2. Or open the main tray to remove the jam paper.


    3. Check if there is any foreign object on the paper path.

    <Video Link>
    4. Check if the light guide pillar of the drum unit is contaminated by clean cotton swab to wipe with isopropyl alcohol (95%).

  • User Check

    1. Need to prepare a new drum unit for replace when the current drum life end.

    <Video Link>

  • User Check

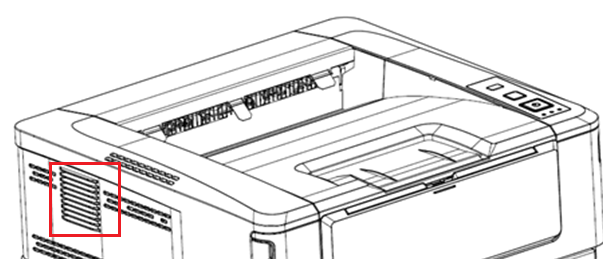
    1. Confirm whther there are someting insert to the fan on vent position to make the fan rotation fail.

  • User Check

    1. Check If there is drum unit installed in the printer or not.

    <Video Link>


    2. Check wether the connecting golden finger of drum had dust and clean by eraser to wipe.

  • User Check

    1. Need to prepare a new toner cartridge for replace when the current toner cartridge life end. <Video Link>

  • User Check

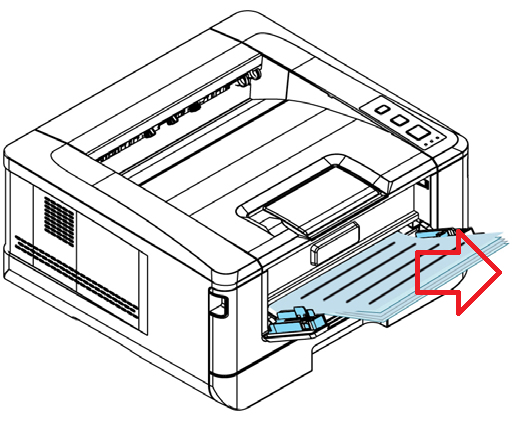
    1. Pick up the jam paper on manual tray.


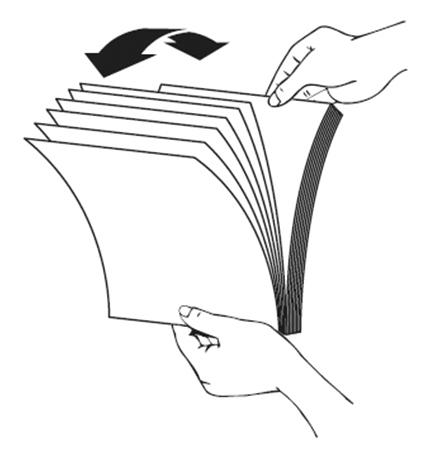
    2. Confirm to fan and sort the paper to put it on the tray again

    <Video Link>

  • User Check

    1. Please try to restart the printer.

    2. Replace the drum unit. <Video Link>

  • User Check

    1. Please replace the toner cartridge. <Video Link>

  • User Check

    1. Replace the drum unit.

    <Video Link>

  • User Check

    1. Open the main tray and removal the jam paper


    2. Reset the paper as well in tray

    3. Close the main tray to try again.
    <Video Link>

×
×

Cart

Select at least 2 products
to compare