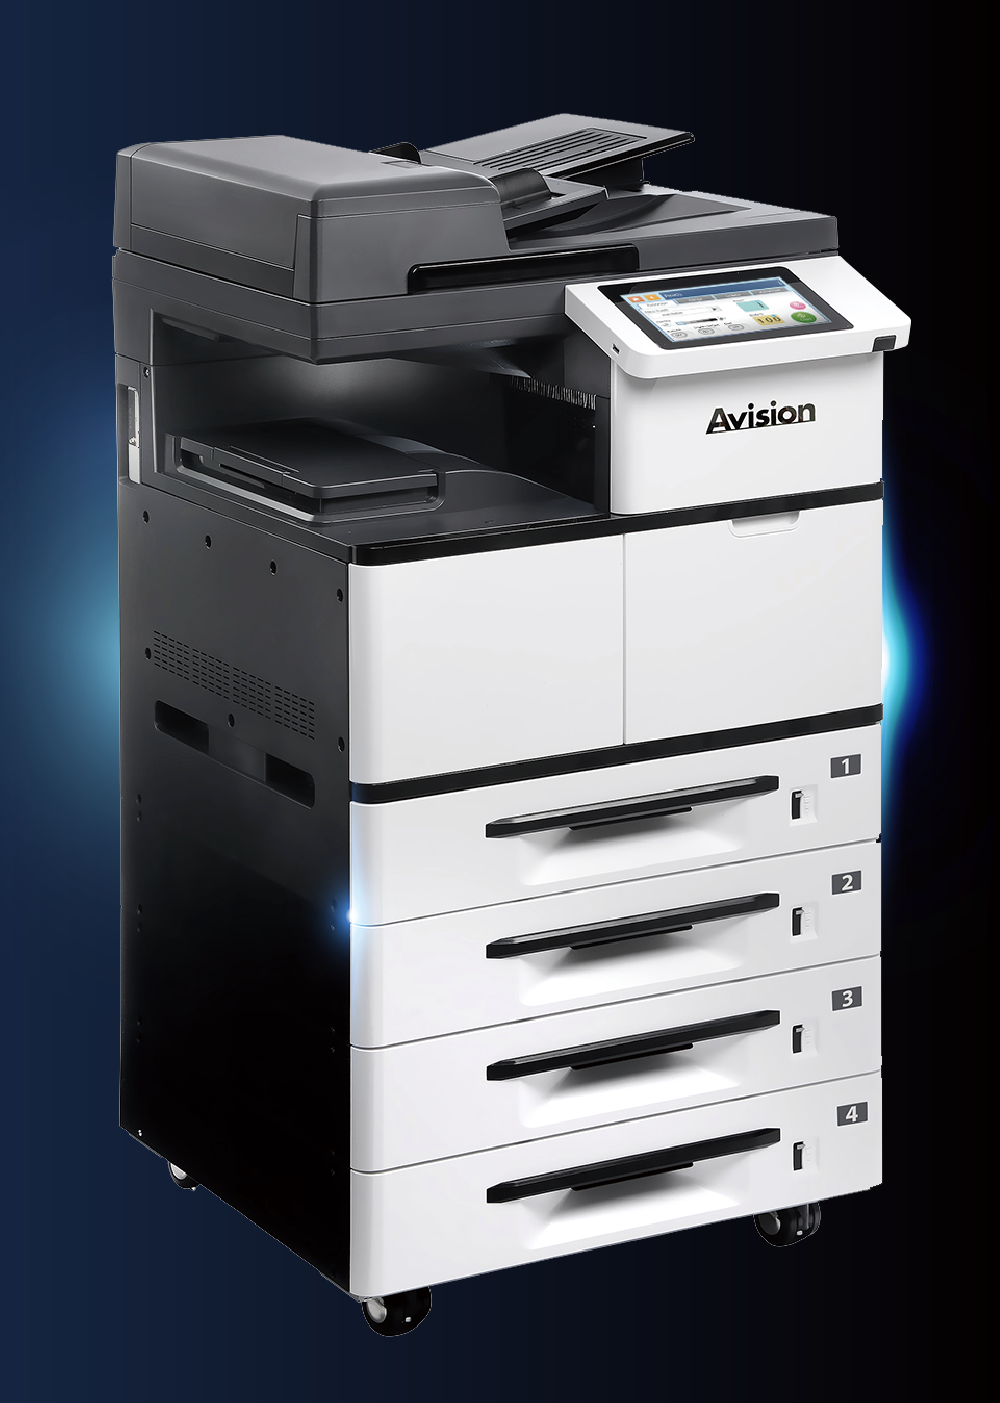
AM76 series

Print, Copy, E-mail, and Scan with the Avision AM7640i MFP

We’ve taken the office-critical features of our large departmental MFPs and packed them into this ultra-productive A3-size printer. It seamlessly integrates print, scan, e-mail, and copy functionality. All these features are operated through a clear and large 8” LCD touch screen to simplify work for busy offices with high-volume of document distribution. What is best, with the intelligent “Drop N Take” and “ID card authentication” features, your copy job can be done easily and securely.

Product Details


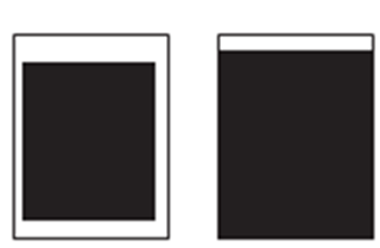
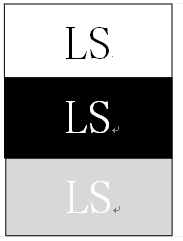
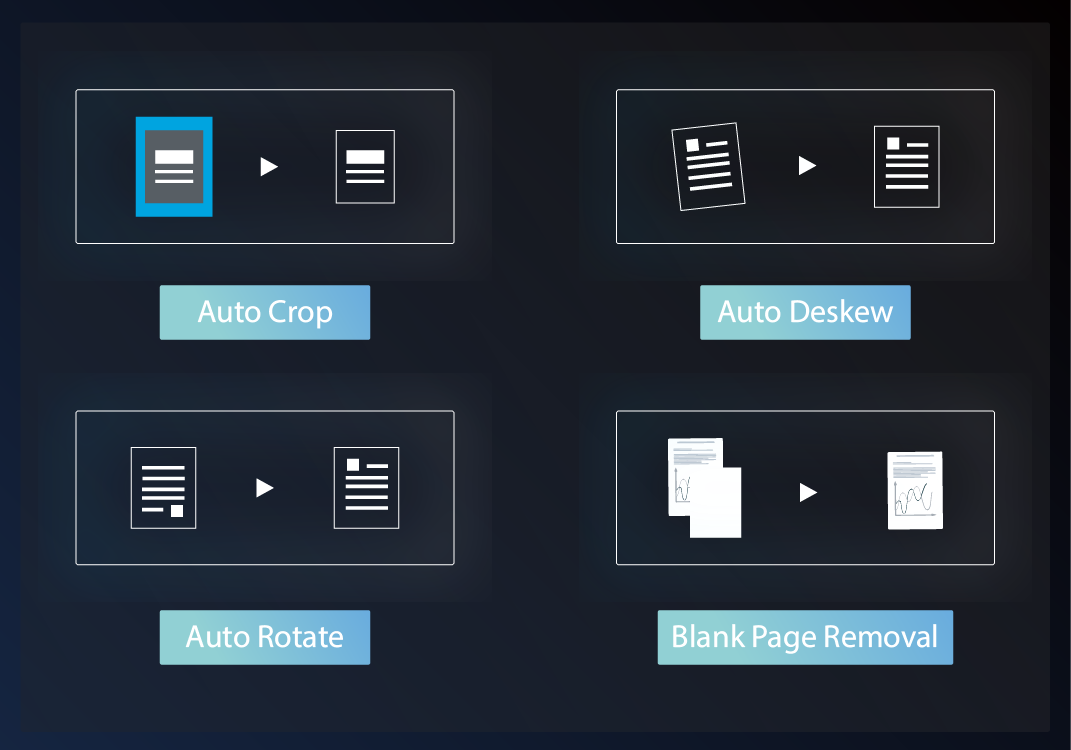
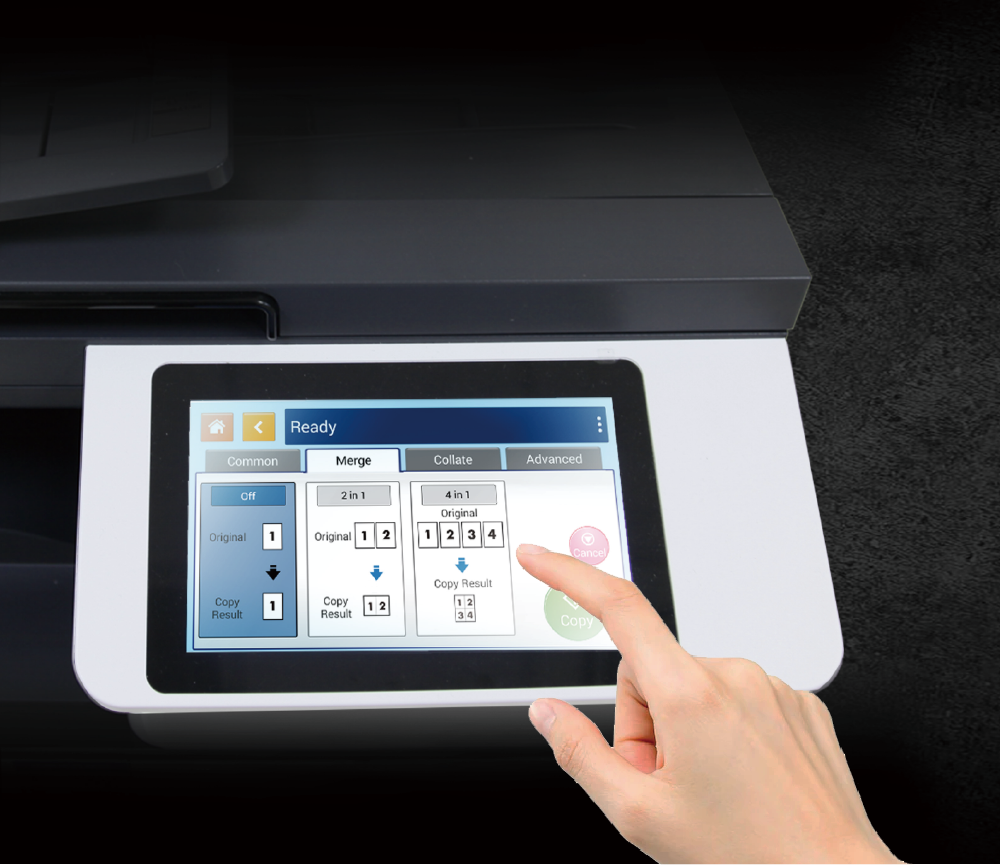
▍Unique auto crop / deskew and blank page removal feature

The Avision’s innovative intelligent copy allows you to insert your document easily to the feeder or on the glass platen, and then the next second a perfect copy can be done automatically. If a document is not inserted correctly, the image can be automatically cropped and straightened during scanning. Plus, with the blank page detection and removal feature, the blank page can be detected and deleted without being printed. All these features let you complete your copy efficiently and effectively.


AM76_S1
AM76_S2

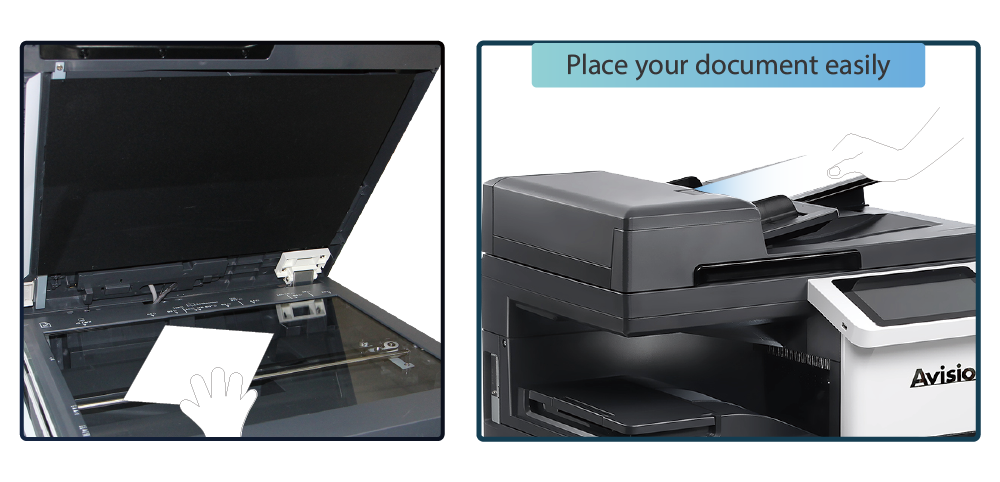
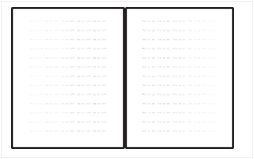
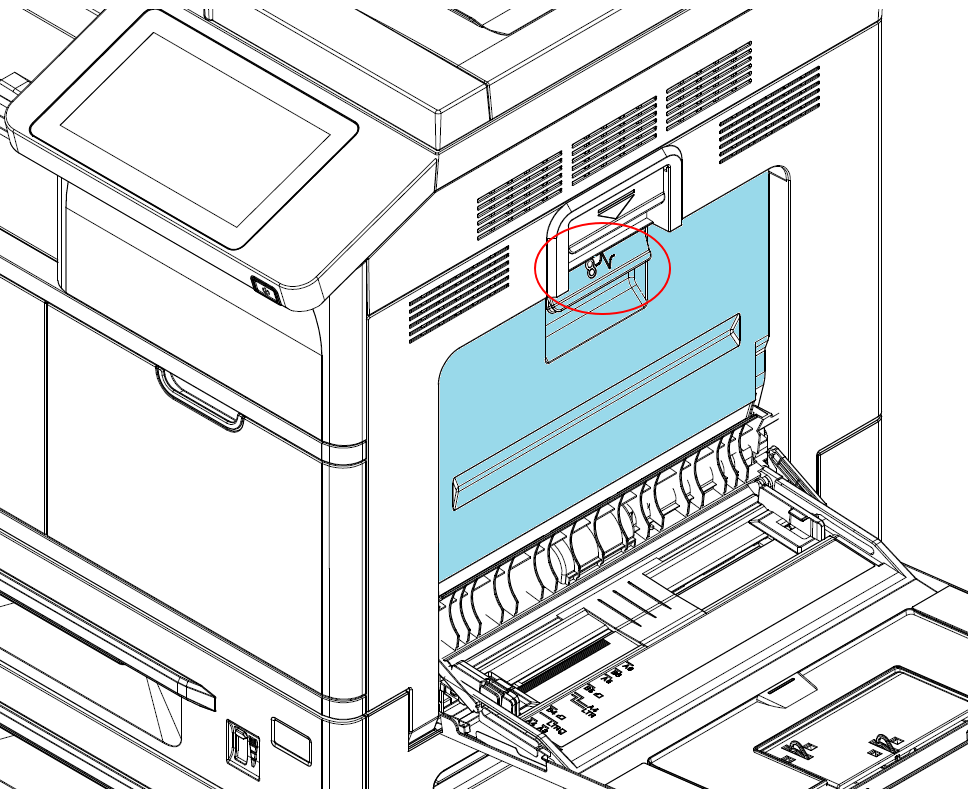
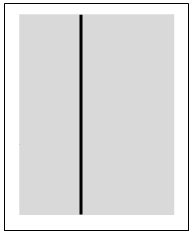
▍No More Trouble to Place Documents on the Feeder/Platen Glass

The intelligent “Drop N Take” feature allows you to simply load your document easily to the feeder or on the glass then the next second your copy is automatically straightened. It is simply that easy without having to press any button!


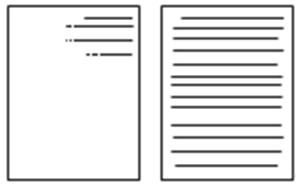
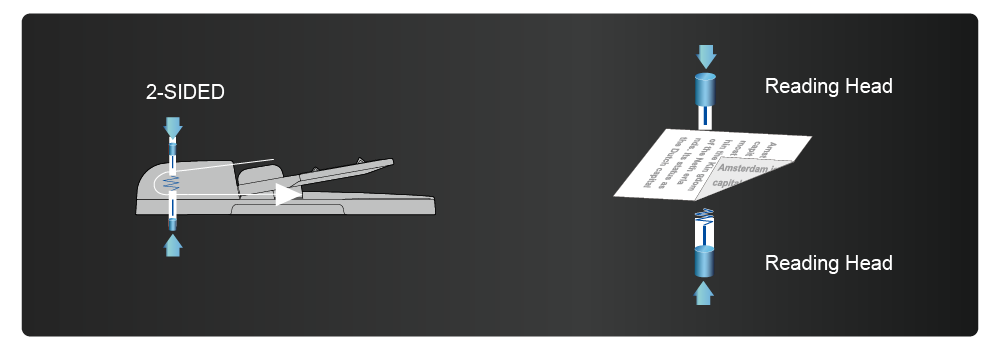
▍Two reading heads save twice working time

Featuring two reading heads, the product is able to achieve two-side (front and read side) scanning in one scan, meaning the page does not need to pass through the feeder twice to save your working time.

AM76_S3
AM76_S4

▍Easy-to-use via the simple user interface

Easy to read and navigate, the large 10-inch, bright color touch screen guides you through even the most complex operations. Simply make a few touches on the touch screen, your document can be digitized and distribute within seconds.
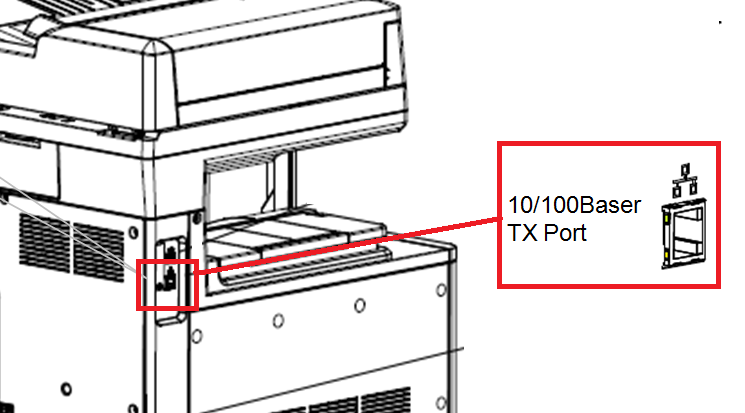
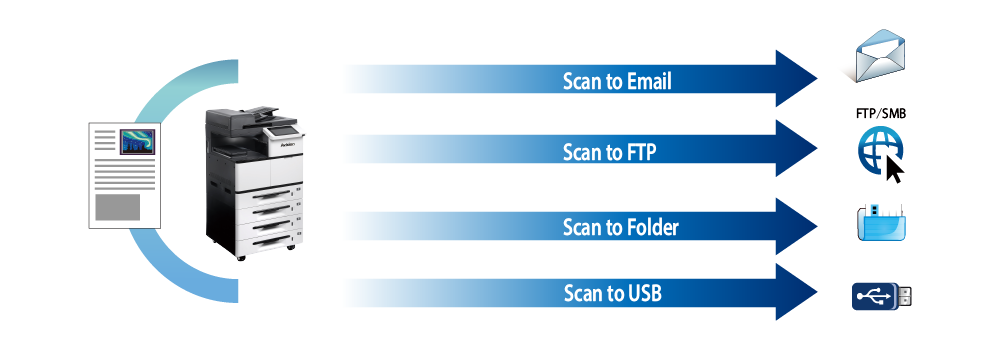
Preview your copy result on screen Lets you verify your result and choose which side you want to copy.

▍Advanced scanning capabilities

The product lets you scan paper-based documents in full color in PDF, JPEG, or TIFF file format and send them to a variety of destinations such as E-mail, FTP, USB and network folder (SMB).


AM76_S5

▍Convenient mobile printing, and scanning

Wirelessly print, or scan from your mobile devices through Avision’s app for the MFPs.

AM76_S6

▍Convenient walk-up printing and scanning

A USB direct interface is available for printing files from or scanning files to your USB flash memory drive.

AM76_S7

▍Easy customization based on Android system

Based on Android operating system, the AM7640i provides convenience to customize your workflow so that your work is easy to be done.
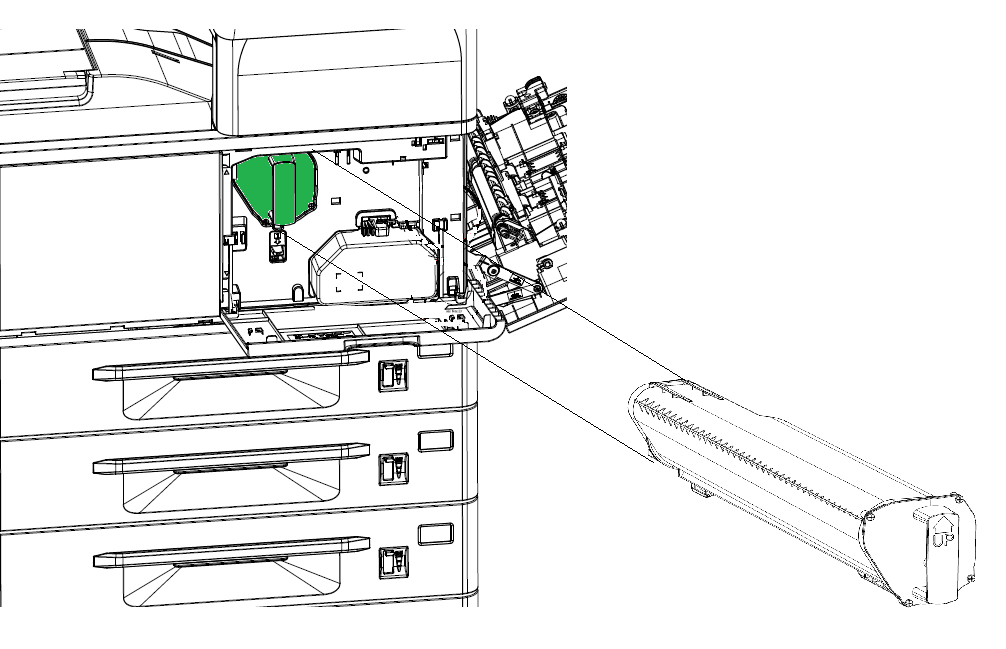
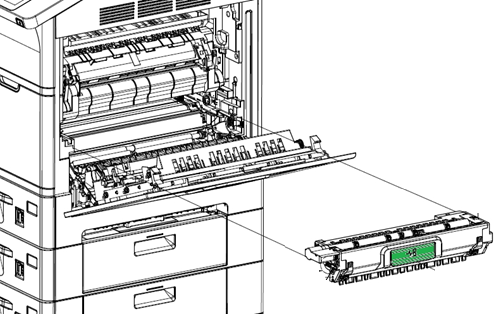
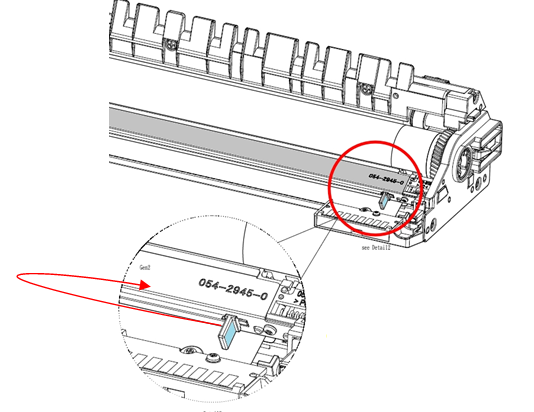
 

AM76_S8
AM76_S9

▍Automatic two-sided printing

Allows you to print on both sides of the page, cutting your paper use by up to 50%.

▍High-yield toner cartridge

The AM7600i Series is shipped with easy-to-install, high-yield 20,000-page toner cartridges that deliver a low cost per page.

▍High-capacity paper tray

With a main capacity of 530 sheets and expandable to 2,220 sheets, Say goodbye to frequent paper refills, ensuring seamless workflow and increased efficiency.

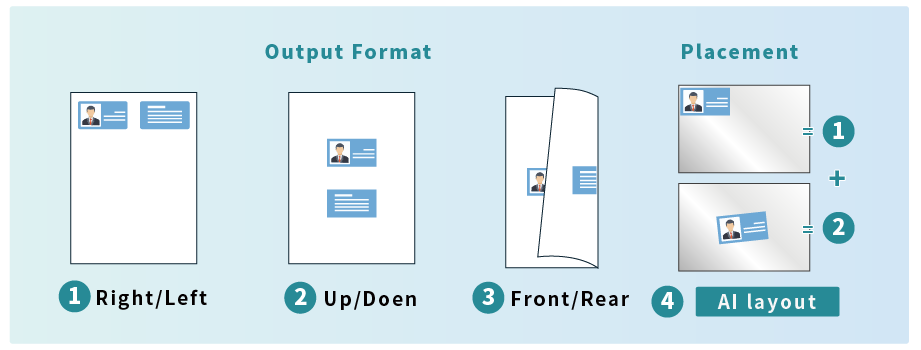
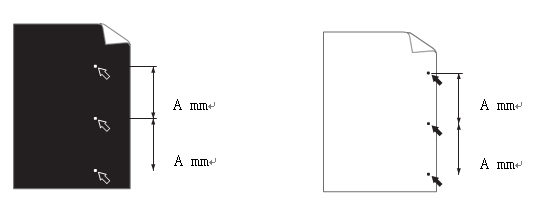
▍Get a perfect ID card copy from the AM7600i Series

No need to align your card.The AI image processing technology automatically detects, rotates, crops, and straighten your images. Plus, a few popular layouts have been provided for various requirements.
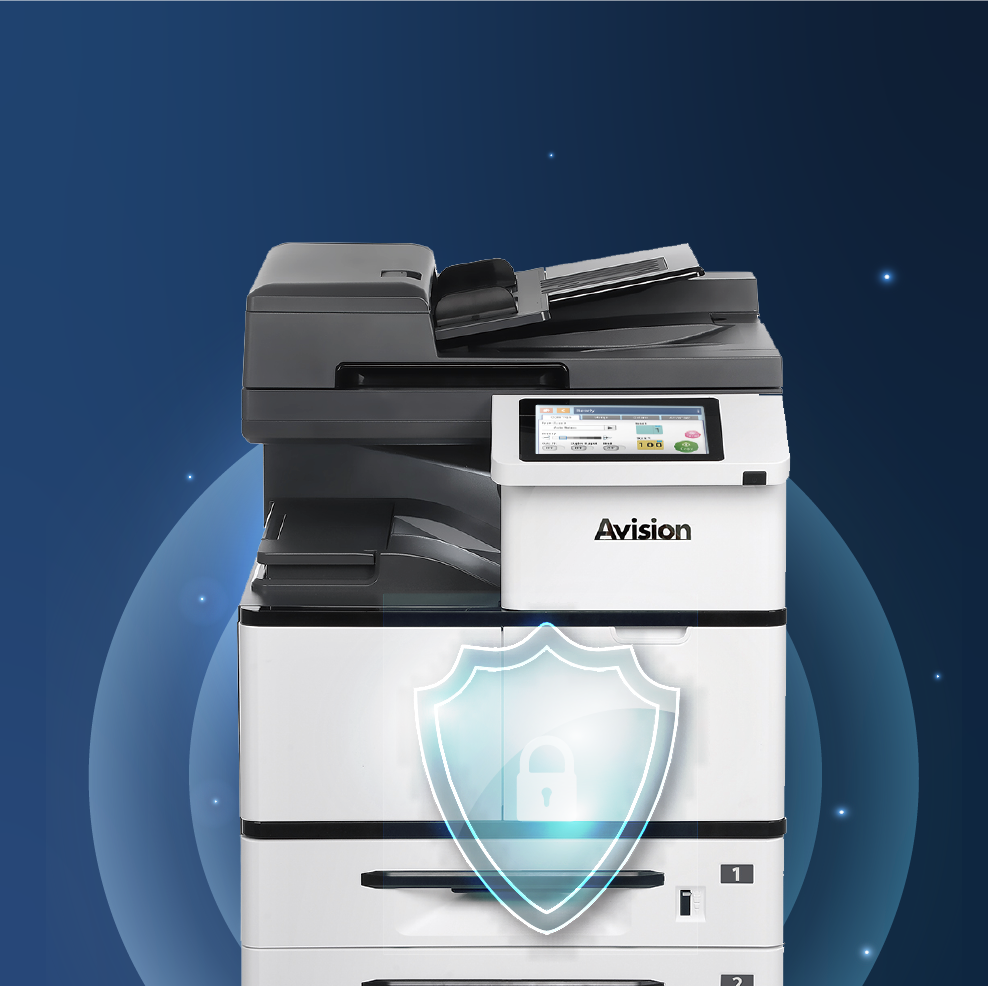
AM76_S11

AM76_S10
AM76_S12

▍Control access to MFPs by ID card

The AM7600i Series provides a secure way to access the machine by ID cards. By scanning the ID card on the control panel, administrators can assign usage privileges quickly and easily. The solution is designed for companies with many different departments, all with individual needs and offices concerned with reducing waste and tightening security.


Specification

General Specification
Functions

Copy – Print – Scan – Network

CPU

1GHz

RAM

2 GB

Paper output capacity

500 sheets

Display

8" LCD

Duplex printing unit

Built – in

Duplex print

Paper size:A3, A4, B4(JIS), A5, B5(JIS), letter, legal, customized size 148 x 210 to 304.8 x 431.8 mm;Paper weight:60 to 105 g/m2

Connectivity

USB2.0, RJ-11, RJ-45

Dimensions (WxDxH)

575 x 568 x 786 mm(22.6 x 22.3 x30.9 in.)

Weight

45 kg (99 lb.)

Power Supply

100-120 VAC, 60 Hz or 220-240 VAC, 50/60 Hz

Standard support Paper Capacity

1,100 sheets

Maximum support Paper Capacity

2,100 sheets

Manual tray
Paper capacity

100 sheets ( 70 g/m2 plain paper )

Paper size

A4, A5, letter, Legal, B4(11S), B5(JIS), customized size 148 x 210 to 304.8 x 431.8 mm, A3

Paper weight

60 to 163 g/m2

Tray 1 and tray 2
Paper capacity

500 sheets ( 70 g/m2 plain paper )

Paper size

A4, A5, B5, Letter, Legal, A3, B4(11S), customized size 148 x 210 to 304.8 x 431.8 mm

Paper weight

60 to 105 g/m2

Tray 3 and tray 4
Paper capacity

500 sheets ( 70 g/m2 plain paper )

Paper size

A3, A4, B4(11S), A5, B5(JIS), letter, legal, customized size 148 x 210 to 304.8 x 431.8 mm

Paper weight

60 to 105 g/m2

Print Function
Printing Method

LSU

Printing Speed

AM7630i:30 ppm (A4 LEF);AM7640i:40 ppm (A4 LEF)

Maximum media size

297 x 420 mm

Minimum media size

100 x 148 mm

Resolution

1200 x 1200 dpi

PDLs/Emulations

PCL / PS / GDI

Supported operation system

Linux, Win 11 , Win 10 , Win 8 , Win 7, Mac

First print output time

< 9sec.

N-up Print

2 to 16 in one

Edge Erase

4.3 mm ( top, bottom, left, right )

Duplex Print

Booklet , Calendar

Network Print

Yes

Copy Function
Copy Size

Ledger (ADF only), A3, Legal, Letter,A4, A5, B4(115), B5(JIS), 8K, 16K, Postcard

Max scanning size

A3 ( Ledger at ADF)

Min media size

100 x 148 mm

Copy Resolution

600 x 600 dpi

Copy Speed

AM7630i:30 cpm (A4 LEF);AM7640i:40 cpm (A4 LEF)

Copy Count

999, Auto Reset to 1

intelligent copy

auto crop / autodeskew / auto blank page removal

Flatbed auto paper size detection

LIR, A4, LGL, A3

ADF auto paper size detection

DLT, A3, LG, B4(11S), A4 SEF, A4 LEF, A5SEF,A5LEF,B5(JIS) SEF, B5(JIS) LEF, LT LEF

Auto Paper Tray Select

Yes

Zoom

25 % ~ 400 %

Full Page Copy

Yes

N-up Copy

2 in 1 / 4 in 1 / ID Card ( N-up Copy )

Duplex Copy

Booklet, Calendar

Copy Sides

1->1, 2->1, 1->2, 2->2

Density

Level 1-7

Consumables (option)
Toner Cartridge

6,000 prints/ 10,000prints/ 20,000prints

Drum Unit

150,000 prints

Development Unit

300,000 prints

Fusing Unit

300,000 prints

* The above specifications may vary due to computer performance and sales regions. For further details, please consult your local distributor.

▎Product Photos

200
High resolution Medium resolution Low resolution
1.63 MB 372.96 KB 213.50 KB
DownloadDownloadDownload

▎User Manual

NameVersionSizeLink
AM76 seriesРусский9.81 MBDownload
AM76 seriesEnglish8.31 MBDownload

▎Brochure

NameVersionSizeLink
AM76 seriesEnglish764.66 KBDownload

▎Quick Guide

NameVersionSizeLink
AM76 SeriesРусский1.23 MBDownload
AM76 SeriesEnglish1.78 MBDownload

▎Drivers

NameVersionSizeOS SupportLink
AM76 seriesdeb_32bit4.73 MBUbuntu , Linux Mint , Debian GNU/Linux , etc...Download
AM76 seriesdeb_64bit5.14 MBUbuntu , Linux Mint , Debian GNU/Linux , etc...Download
AM76 seriesrpm_32bit4.73 MBFedora , openSUSE , CentOS(Red Hat Enterprise Linux) , etc...Download
AM76 seriesrpm_64bit5.14 MBFedora , openSUSE , CentOS(Red Hat Enterprise Linux) , etc...Download
AM7640iV5.7043.7 MBWin 7 , Win 8 , Win 10 , Win 11Download

Distributor FAQ

▎Instruction

  • Image Problem: Poor Positioning

    User Check

    1. Check if proper paper type has been selected in printer driver.

  • Error Code 500000: IP Conflict.

    There are two or more PC using the same IP in the same one LAN area.

    User Check

    1. Please reset the fixed IP address, or contact to IT person to check the router setting.

  • Error Code 200001: No Matched Paper.

    This message show when there is no any size of your PC point in all the tray, just reminder the user to input the right paper they want.

    User Check

    1. Load the size you point by software(Word or PDF editer/reader...etc) and choose the tray you want.
    2. Or else choose a tray to print by other size paper directly.
    3. Also, check wehter the MFP can identify the right size paper you load in the tray, if it show the unknown, check the width guide and length guide fix the paper well.

    4. Reminder, A6 size for manual tray only.

  • Error Code 500003: Can not Connect to Network.

    This message is displayed when the WiFi fails to connect to the SSID of the wireless router.

    User Check

    1. Check whether the password was wrong.
    2. Check the Wi-Fi router work fine.

  • Error Code 500002: DHCP no Respond.

    This error occurs when the printer requests information from the DHCP server and DHCP server does not respond.

    User Check

    1. Search the CMD and launch on your PC(by Windows OS).

    2. key-in inconfig/all to check whether the DHCP server work in advance.
    In normally. it should work.

    3. If not, contact to IT person to check the DHCP server setting.

  • Error Code 500001: Net Cable Unplug.

    User Check

    1. Please plug the ethernet cable.
    2. If it still happen, test this cable on others devive to ensure this cable work, or not, try with another cable.

    3. If you didn't set as DHCP, try to check the IP setting.

▎Hardware Related

  • Error Code 200036: Toner Cartridge Error. Please Rplace Toner Cartridge from Original Manufacturer.

    User Check

    1. Please ensure you had replaced the toner cartridge from the original manufacturer.

  • Error Code 201630: Fuser Error.

    User Check

    1. Please try to restart the printer.

  • Error Code 200035: Waste Toner Can near full

    User Check

    1. Need to prepare a new waste toner can for replace when the current toner can full.

  • Error Code 200034: Waste Toner Can is Full

    User Check

    1. Clean the opening of the Waste Toner Can or replace the Waste Toner Can with a new one.

  • Error Code 200033: No Waste Toner Can

    User Check

    1. Reinstall the waste toner can.

  • Error Code 200030:No Toner Cartridge.

    User Check

    1. Try to reinstall the toner cartridge.

    2. Check wether the connecting golden finger of drum had dust and clean by eraser to wipe.

  • Error Code 200032: Toner Cartridge Lifetime Near End

    User Check

    1. Need to prepare a new toner cartridge unit for replace when the current toner cartridge life end.

  • Error Code 200031: Toner End of Life. Please Replace Toner Cartridge.

    User Check

    1. Try to reinstall the toner cartridge.

  • Error Code 201621: Fuser Error.

    User Check

    1. Please try to restart the MFP.
    2. Replace the fuser.

  • Image Problem: Color Gradually Lighter from Top to Bottom.

    User Check

    1. Replace toner cartridge.

  • Error Code 200352: Paper Jam.

    User Check

    1. Open the side door.
    2. After locating the paper jam position, pull up the end of the jammed paper first.  
    3. Press the release arms on both sides of the drum.
    4. Remove the jammed paper and pull up the green release arms on both ends.
    5. Close the side door to try again.

    <Video Link>

  • Error Code 200353: Paper Jam.

    User Check

    1. Open the side door.
    2. After locating the paper jam position, pull up the end of the jammed paper first.  
    3. Press the release arms on both sides of the drum.
    4. Remove the jammed paper and pull up the green release arms on both ends.
    5. Close the side door and try again.

    <Video Link>

  • Image Problem: Image Distortion.

    User Check

    1. Check whether happen both on PC print and copy function.
    2. If it happen only on copy function, check your original document.

  • Error Code 200317: Paper Jam.

    User Check

    1. Open the tray 3.
    2. Removal the jam paper.
    3. Reset the paper as well in tray.
    4. Close the tray 3 to try again.
    5. If the problem still happen, try to clean the tray roller.

    <Video Link>

  • Error Code 201613: Fuser Error.

    User Check

    1. Please try to restart the MFP.
    2. Replace the fuser.

  • Error Code 201614: Fuser Error.

    User Check

    1. Please try to restart the MFP.
    2. Replace the fuser.

  • Error Code 201619: Fuser Error.

    User Check

    1. Please try to restart the MFP.
    2. Replace the fuser.

  • Error Code 201624: Fuser Error.

    User Check

    1. Please try to restart the MFP.

    2. Replace the fuser.

  • Error Code 201620: Fuser Error.

    User Check

    1. Please try to restart the MFP.
    2. Replace the fuser.

  • Error Code 201617: Fuser Error.

    User Check

    1. Please try to restart the MFP.
    2. Replace the fuser.

  • Error Code 201616: Fuser Error.

    User Check

    1. Please try to restart the MFP.
    2. Replace the fuser.

  • Error Code 201604: Fuser Error.

    User Check

    1. Please try to restart the MFP.
    2. Replace the fuser.

  • Error Code 201615: Fuser Error.

    User Check

    1. Please try to restart the MFP.
    2. Replace the fuser.

  • Error Code 201600: Fuser Error.

    User Check

    1. Please try to restart the MFP.
    2. Replace the fuser.

  • Error Code 201618: Fuser Error.

    User Check

    1. Please try to restart the MFP.
    2. Replace the fuser.

    z
  • Error Code 201605: Fuser Error.

    User Check

    1. Please try to restart the MFP.
    2. Replace the fuser.

  • Error Code 201607: Fuser Error.

    User Check

    1. Please try to restart the MFP.
    2. Replace the fuser.

  • Error Code 201612: Fuser Error.

    User Check

    1. Please try to restart the MFP.
    2. Replace the fuser.

  • Image Problem: Too Light (Partly).

    User Check

    1. Check the operating environment. high temperature and high humidity or low temperature and low humidity conditions can cause this problem.
    2. Check if the side door has been properly closed.

    3. Check if the toner cartridge has been correctly installed.
    4. Replace the toner cartridge.
    5. Paper may not meet the specification supported by the device.

  • Image Problem: Print Blur.

    User Check

    1. Check if the device is evenly installed.
    2. Reinstall or even replace the drum unit.

    3. Replace the Toner cartridge.

  • Image Problem: White Vertical Line.

    User Check

    1. Clean corona wire of the drum unit.
    Slide the corona wire to the end and then back to the original place. repeat this for at least 3 times.


    2. Replace the drum unit.

  • Image Problem: Print all Black.

    User Check

    1. Clean corona wire of the drum unit.
    Slide the corona wire to the end and then back to the original place. repeat this for at least 3 times.

    2. Or try to replace the drum unit.

  • Image Problem: White Spots.

    User Check

    1. Check whether fixed distance of the dust on the paper and measure it, 97.38 mm is manual tray pick up roller, 56.54 mm/94.2 mm is drum issue and 49.0 mm/36.0mm/143.0mm is develop issue and 81.68 mm/94.2 mm is fuser issue, judge which one need to be replace.
    The range 94.2 mm had probability for both fuser & drum unit, check them together.

    2. Replace the drum unit.

    3. Or replace the develop unt.

    4. Or even try to replace the fuser.


  • Error Code 200017: Invalid Develop Unit.

    User Check

    1. Please ensure you had replaced the develop unit from the original manufacturer.

  • Image Problem: White Horizontal Line.

    User Check

    1. This problem can disappear by itself after printing a few pages.
    2. Or try to replace drum unit.

  • Image Problem: Gray Background.

    User Check

    1. Check the operating environment. High temperature and high humidity or low temperature and low humidity conditions can cause this problem.
    2. Replace the drum unit.

    3.

  • Image Problem: Black Spots.

    User Check

    1. Check whether fixed distance of the dust on the paper and measure it, 97.38 mm is manual tray pick up roller, 56.54 mm/94.2 mm is drum issue and 49.0 mm/36.0mm/143.0mm is develop issue and 81.68 mm/94.2 mm is fuser issue, judge which one need to be replace.
    The range 94.2 mm had probability for both fuser & drum unit, check them together.

    2. Replace the drum unit.

    3. Or replace the develop unt.

    4. Or even try to replace the fuser.

  • Image Problem: Ghost (Type 1).
    This image has an empty alt attribute; its file name is image-27.png

    User Check

    1. Check the operating environment. High temperature and high humidity or low temperature and low humidity conditions can cause this problem.
    2. Or try to replace the develop unit.

  • Image Problem: Ghost (Type 2).
    This image has an empty alt attribute; its file name is image-28.png

    User Check

    1. Check the operating environment. High temperature and high humidity or low temperature and low humidity conditions can cause this problem.
    2. Or try to replace the develop unit.

  • Image Problem: Black Horizontal Lines.

    User Check

    1. Clean corona wire of the drum unit.
    Slide the corona wire to the end and then back to the original place. repeat this for at least 3 times.


    2. This problem will disappear after printing for a few pages.
    3. Or try to replace the drum unit.

    4. Or try to replace the develop unit.

  • Image Problem: Blank Vertical Band.

    User Check

    1. Clean corona wire of the drum unit.
    Slide the corona wire to the end and then back to the original place. Repeat this for at least 3 times.

    2. This problem will disappear after printing for a few pages.
    3. Or try to replace the drum unit.

    4. Or try to replace the develop unit.

  • Image Problem: Horizontal Lines.

    User Check

    1. Clean corona wire of the drum unit.
    Slide the corona wire to the end and then back to the original place. repeat this for at least 3 times.

    2. This problem will disappear after printing for a few pages.
    3. Or try to replace the drum unit.

    4. Or try to replace the develop unit.

  • Image Problem: Vertical Lines.

    User Check

    1. Clean corona wire of the drum unit.
    Slide the corona wire to the end and then back to the original place. repeat this for at least 3 times.

  • Image Problem: Blur Image.

    User Check

    1. Check the operational environment. High or low temperature could cause this problem.
    2. Check if the paper is dampened.
    3. Or replace the toner cartridge.

    4. Or else replace the develop unit.

  • Error Code 200354: Paper Jam.

    User Check

    1. Open the side door.
    2. Open the fuser out guide part to check the paper jam position, then close it.
    3. Press the green plastic of fuser both side.
    4. Press the green plastic of drum both side, too.
    5. Removal the jam paper and return all the green plastics.
    6. Close the side door to try again.

    <Video Link>

  • Image Problem: Blank Page.

    User Check

    1. Replace the develop unit.

    2. Clean corona wire of the drum unit.

    3. Replace the drum unit.

  • Error Code 200351: Paper Jam.

    User Check

    1. Open the side door.
    2. Removal the jam paper form the duplex path upper side.
    3. Close the side door to try again.

    <Video Link>

  • Error Code 200349: Paper Jam.

    User Check

    1. Open the duplex path cover.
    2. Open the side door.
    3. Removal the jam paper form the duplex path down side.
    4. Close the side door and duplex path cover then try again.

    <Video Link>

  • Error Code 200348: Paper Jam.

    User Check

    1. Open the duplex path cover.
    2. Open the side door.
    3. Removal the jam paper form the duplex path upper side.
    4. Close the side door and duplex path cover then try again.

    <Video Link>

  • Error Code 200347: Paper Jam.

    User Check

    1. Open the side cover of tray 3 & tray 4.
    2. Removal the jam paper.
    3. Close the side cover of tray 3 & tray 4 and try again.

    <Video Link>

  • Error Code 200346: Paper Jam.

    User Check

    1. Open the side cover of tray 3 & tray 4.
    2. Removal the jam paper.
    3. Close the side cover of tray 3 & tray 4 and try again.

    <Video Link>

  • Error Code 200345: Paper Jam.

    User Check

    1. Open the side cover of tray 2 & tray 3.
    2. Removal the jam paper.
    3. Close the side cover of tray 2 & tray 3 and try again.

    <Video Link>

  • Error Code 200344: Paper Jam.

    User Check

    1. Open the side cover of tray 2 & tray 3.
    2. Removal the jam paper.
    3. Close the side cover of tray 2 & tray 3 and try again.

    <Video Link>

  • Error Code 200343: Paper Jam.

    User Check

    1. Open the side cover of tray 2.
    2. Raise the upper side cover.
    3. Removal the jam paper.
    4. Close the side cover of tray 2.
    5. Check if there is too much paper in the tray 2 or sort the paper to try again.
    <Video Link>

  • Error Code 200342: Paper Jam.

    User Check

    1. Open the side cover of tray 2.
    2. Raise the upper side cover.
    3. Removal the jam paper.
    4. Close the side cover of tray 2.
    5. Check if there is too much paper in the tray 2 or sort the paper to try again.

    <Video Link>

  • Error Code 200318: Paper Jam.

    User Check

    1. Open the tray 4.
    2. Removal the jam paper.
    3. Reset the paper as well in tray.
    4. Close the tray 4 to try again.
    5. If the problem still happen, try to clean the tray roller.

    <Video Link>

  • Error Code 200309: Paper Jam.

    User Check

    1. Open the side door by press the latch.
    2. Open the fuser out guide part.
    3. Raise the exit cover to removal the jam paper.
    4. Close the fuser out cover.
    5. Close the side door to try again.
    <Video Link>

  • Error Code 200306: Paper Jam.

    User Check

    1. Open the side door by press the latch.
    2. Removal the jam paper.
    3. Close the side door to try again.
    <Video Link>

  • Error Code 200303: Paper Jam.

    User Check

    1. Open the tray 2.
    2. Removal the jam paper.
    3. Reset the paper as well in tray.
    4. Close the tray 2 to try again.
    5. If the problem still happen, try to clean the tray roller.
    <Video Link>

  • Error Code 200302: Paper Jam.


    User Check

    1. Open the main tray
    2. Removal the jam paper
    3. Reset the paper as well in tray
    4. Close the main tray to try again.
    5. If the problem still happen, try to clean the tray roller then try again.

    <Video Link>

  • Error Code 200301: Paper Jam.

    User Check

    1. Pick up the jam paper on manual tray.
    2. Confirm and sort the paper to put it on the tray again.
    3. If the problem still happen, take out the paper and push the roller to left side and pick it up.
    4. Clean the pad and try again.
    <Video Link>

  • Image Problem: Too Light.

    User Check

    1. Check the operating environment. High temperature and high humidity or low temperature and low humidity conditions can cause this problem.
    2. If the color of the whole paper is very light, it is possible that the toner save mode is turned on. Please turn off toner save mode.
    3. Replace the toner cartridge.


    4. Rplace the drum unit.

    5. Check if the paper is not damp.
    6. Paper may not meet the specification supported by the device.

  • Image Problem: Gray Background (Partly).

    User Check

    1. Clean corona wire of the drum unit.
    Slide the corona wire to the end and then back to the original place. repeat this for at least 3 times.

    2. Replace the drum unit.

    3. Replace the Toner cartridge.

  • Image Problem: Dirty Background.

    User Check

    1. This problem can disappear by itself after printing a few pages.
    2. Check whether fixed distance of the dust on the paper and measure it, 97.38 mm is manual tray pick up roller, 56.54 mm/94.2 mm is drum issue and 49.0 mm/36.0mm/143.0mm is develop issue and 81.68 mm/94.2 mm is fuser issue, judge which one need to be replace.
    The range 94.2 mm had probability for both fuser & drum unit, check them together.

    3. Clean/replace the manual pick up roller.

    4. Replace the drum unit.


    5. Or replace the develop unt.


    6. Or even try to replace the fuser.

  • Error Code 200057: Front Door Opens.

    User Check

    1. Check whether the front door actually close well.

  • Error Code 200050: Side Door Opens.

    User Check

    1. Check whether the side door actually close well.

  • Error Code 200060: Tray 1 Error.

    User Check

    1. Please try open and then close tray 1 well to recover.

  • Error Code 200052: Tray 2 Cover Opens.

    User Check

    1. Check whether the tray 2 side cover actually close well.

  • Error Code 200056: Duplex Unit Cover Opens.

    User Check

    1. Close duplex unit cover.

  • Error Code 200053: Tray 3 Cover Opens.

    User Check

    1. Check whether the tray 3 side cover actually close well.

  • Error Code 200061: Tray 2 Error.

    User Check

    1. Please try open and then close tray 2 well to recover.

  • Error Code 200062: Tray 3 Error.

    User Check

    1. Please try open and then close tray 3 well to recover.

  • Error Code 200063: Tray 4 Error.

    User Check

    1. Please try open and then close tray 4 well to recover.

  • Error Code 200055: Tray 4 Cover Opens.

    User Check

    1. Check whether the tray 4 side cover actually close well.

  • Error Code 200090: Fan Error.

    User Check

    1. Confirm whther there are someting insert to the fan on vent position to make the fan rotation fail.

  • Error Code 200091: Fan Error.

    User Check

    1. Confirm whther there are someting insert to the fan on vent position to make the fan rotation fail.

  • Error Code 200000: Multi-Feed Error.

    User Check

    1. Check if paper in the tray exceeds capacity, try to reduce some paper.
    2. Check if paper loaded into the tray correctly.
    3. Turn the paper upside down or turn it 180° and then reload to the tray.
    4. Fan the paper and then reload into paper tray.

  • Error Code 200092: Fan Error.

    User Check

    1. Confirm whther there are someting insert to the fan on vent position to make the fan rotation fail.

  • Error Code 200141: No Drum Unit.

    User Check

    1. Check If there is drum unit installed in the printer or not.

    2. Check wether the connecting golden finger of drum had dust and clean by eraser to wipe.

  • Error Code 200014: No Develop Unit

    User Check

    1. Check the golden finger cable connect well or clean the connecting golden finger by eraser to wipe.

    2. Replace develop unit.

  • Error Code 200040: Develop Unit Sensor Error

    User Check

    1. Check the golden finger cable connect well, try to install again.

    2. Replace the develop unit.

  • Error Code 200142: Drum Unit Lifetime End.

    User Check

    1. Replace the drum unit.

  • Error Code 200143: Drum Unit Lifetime Near End.

    User Check

    1. Need to prepare a new drum unit for replace when the current drum life end.

  • Error Code 302651: Network Initial Fail.

    User Check

    1. Try to restart MFP.

  • Error Code 200144: Invalid Drum.

    User Check

    1. Please ensure you had replaced the drum unit from the original manufacturer.

  • Image Problem: Back of Paper Dirty.

    User Check

    1. This problem can disappear by itself after printing a few pages.
    2. Check whether fixed distance of the dust on the paper and measure it, 97.38 mm is manual tray pick up roller, 56.54 mm/94.2 mm is drum issue and 49.0 mm/36.0mm/143.0mm is develop issue and 81.68 mm/94.2 mm is fuser issue, judge which one need to be replace.
    The range 94.2 mm had probability for both fuser & drum unit, check them together.

    3. Replace the fuser.

  • Image Problem: Low Fusing Quality.

    User Check

    1. Check the operating environment. High temperature and high humidity or low temperature and low humidity conditions can cause this problem.
    2. Fold the printout and rub the image to check if the background is dirty.
    3. Check power outlet output 198~264V。
    4. Check if the paper is damp.
    5. Replace fuser unit.

  • Error Code 200015: Develop Unit Lifetime Ends.

    User Check

    1. Replace the develop unit.

  • Image Problem: Black Vertical Lines on a Light Background.

    User Check

    1. Clean the corona wire or the power grid of the drum unit.
    Slide the corona wire to the end and then back to the original place. Repeat this for at least 3 times.

    2. Replace the drum unit.

×
×

Cart